 Search by Vehicle
 Search by Product
 Search by Free Word
 Stock Inquiry
MONITOR
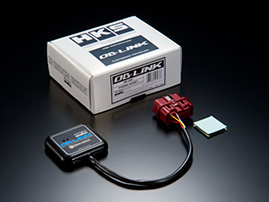
First Step of OB-LINK
Following is the installation procedure for the OB-LINK. There are 3 steps for the installation.
STEP 1. Preparation for Installation
STEP 2. Pairing Setting
STEP 3. Carscope Setting
STEP 1. Preparation for Installation
Prior to installation, check the items mentioned below referring to “OB-LINK Setting/Application List.”
→OB-LINK SETTING/APPLICATION LIST
Check 1: Make sure your vehicle is applicable.
Check 2: Confirm the position of OBD II coupler position.
Check 3: Confirm the vehicle's communication type.
Conditions for Android devices
- Android 6.0 or later
- Equipped with Bluetooth
- Bluetooth supports SPP profile
* If your device does not support the SPP profile, Bluetooth communication cannot use.
Please check the specifications of your device or contact the manufacturer to see if your device supports the SPP profile.
If you meet all the requirements for Android devices, please download and install the App.
If using OB-LINK, it is necessary to download and install the following Apps.
CarscopePlus (FOC)
●When reinstalling regardless of the version
* New installation from Google Play is possible only for devices with Android 6.0 to 8.0.

●When new downloading regardless of the version

OB-BRIDGE (FOC)
●When reinstalling regardless of the version

●When new installing regardless of the version
CarscopeAQUA (FOC)
●When reinstalling on devices up to Android 6.0.1

●When new installing on devices up to Android 6.0.1
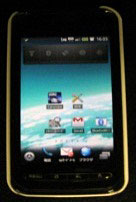
The icon shown below appears when installation is completed.
 * The icon for OB-BRIDGE does not appear on the home screen.
The icon is shown on the application manager of application under setting menu of each device.
Make sure the following 3 items are ready.
- Android Device
- OB-LINK
- CAR

STEP 2. Pairing Setting
Go to your vehicle and begin installation of the OB-LINK.
Pairing Setting
Establish a connection between the OB-LINK and Android device (cellular phone or tablet).
1. OConnect the OB-LINK to the vehicle's OBD II coupler.
* Make sure the red and green LEDs of the OB-LINK unit are blinking. If the LEDs do not come on, reinsert the coupler securely.
2. Establish a connection between the OB-LINK and Android device by registration of new device through Bluetooth on the setting menu of each device. Passkey is "7181".
STEP.3 Carscope Setting
Turn the ignition switch on or start the engine.
Select proper device and communication type using Carscope.
Go to the setting screen after starting Carscope.
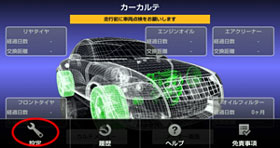

1. Device setting
Touch ▼ to show the list and select "OB-LINK".
When the setting is properly done, the red LED on the unit stops blinking.
2. Communication type setting
Touch ▼ to show the list and select "Communication Type".
When the setting is properly done, the green LED on the unit stops blinking.
Both red and green LEDs on the OB-LINK unit stops blinking, installation is completed.